# Real-Time Chat
High-performant chat application with a wide range of customization options.
# Features
- Separate messenger layout
- Rooms: Public / Invite-only
- Private messages
- AI bots
- Popup
- Widget
- Commands
- Themes
- Reactions
- Quotes
- Mentions
- Notifications
- Reports
- Bans
- Attachments
- Translation of messages using ChatGPT
# Requirements
- PHP 7.4+
- MySQL 5.7+
- XenForo 2.2.0+
- XenForo WebSockets 2.0.0+
- Quill Editor 1.0.0+
# Installation
- Install and configure (opens new window) XenForo WebSockets (opens new window)
- Install Quill Editor
- Install the add-on by first uploading the files to the server or using the "Install from archive" function in the control panel
# Upgrade from 1.x
- Install and configure (opens new window) XenForo WebSockets (opens new window)
- Install Quill Editor
- Connect to the server via SSH
- Go to the forum directory:
cd /path/to/your/forum - Stop the chat server:
php chat_cli stop - Upgrade the add-on by first uploading the files to the server or using the "Install from archive" function in the control panel
After the upgrade, you can delete the chat_cli file from the forum root directory.
# Popup
By default, chat adds a button to the bottom right of the page to open a chat popup window. On mobile it covers the entire screen, and on large screens it opens in picture-in-picture mode.
Popup can be freely moved by holding the left mouse button on the header. The user can also adjust the size of this window. The state of the popup is stored in a cookie, so after changing / closing the page, it will be restored in the form in which the user left it.
# Widget
Can be embedded anywhere in forum. It has a compact mode for embedding in small sections. You can specify which room to open by default.# Embedding
Once installed, the widget will not be displayed automatically.
If you want to show the widget, go to ACP –> Appearance –> Widget –> Real-Time Chat and select the positions where you want to display the widget.
# Options
XenForo 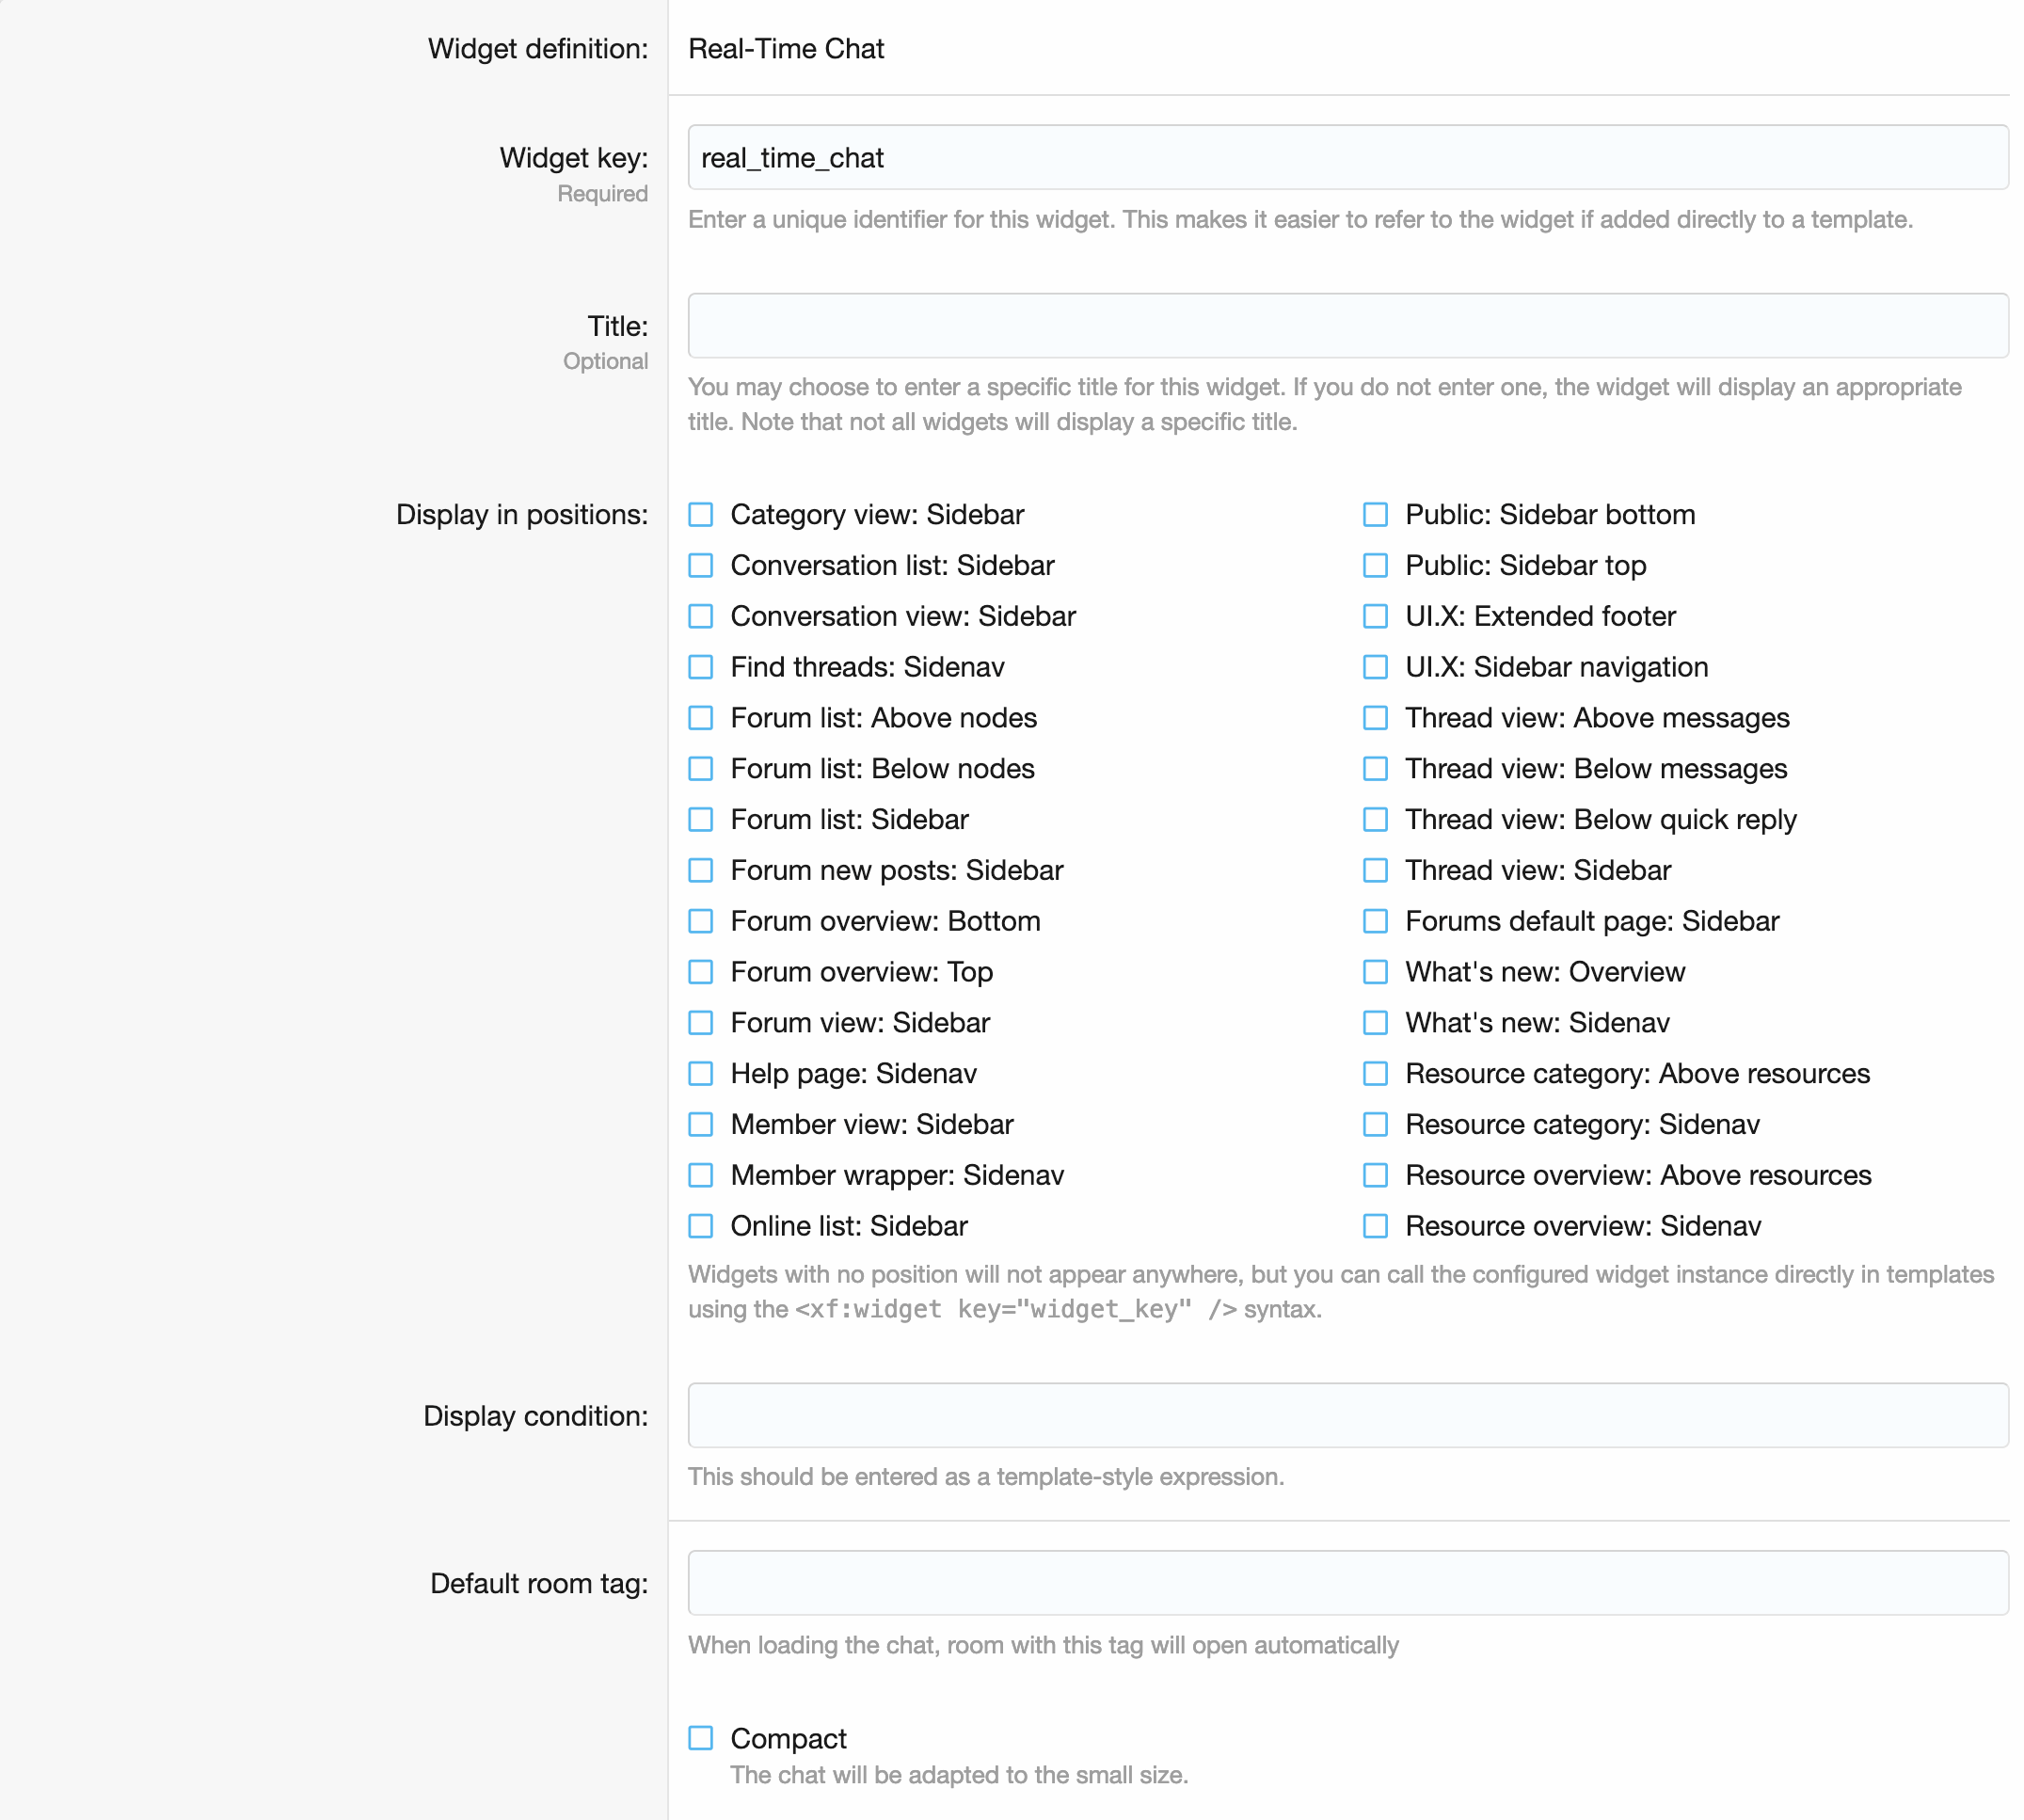
# Commands
The chat can process commands, the list of which can be extended by third-party developers without interfering with the code.
For most commands, there are separate control buttons that actually just send the command to the chat.
# List of commands
/clear {--user="username"} – Deletes all messages in the room. If the user option is specified, only messages from the specific user will be deleted.
/pm username – Sends a private message to the user.
/to username – Addresses a message to the user. The user will receive a notification about the contact in the chat.
/ban {--list} {--lift} – Calling without an argument opens the user's ban form.
If the --list option is specified, a list of bans will be displayed.
If the --lift option is specified, unban form will open.
/leave – To leave the room.
/edit – Opens the room editing form.
/destroy – Deletes the room.
/messages {--on} {--off} – Requires at least one option to be specified. Enables or disables messages from other users.
/link {--refresh} – Gives a new link to join the room.
If the --refresh option is specified, all old links will become invalid.
/wallpaper – Opens the form for updating the room design.
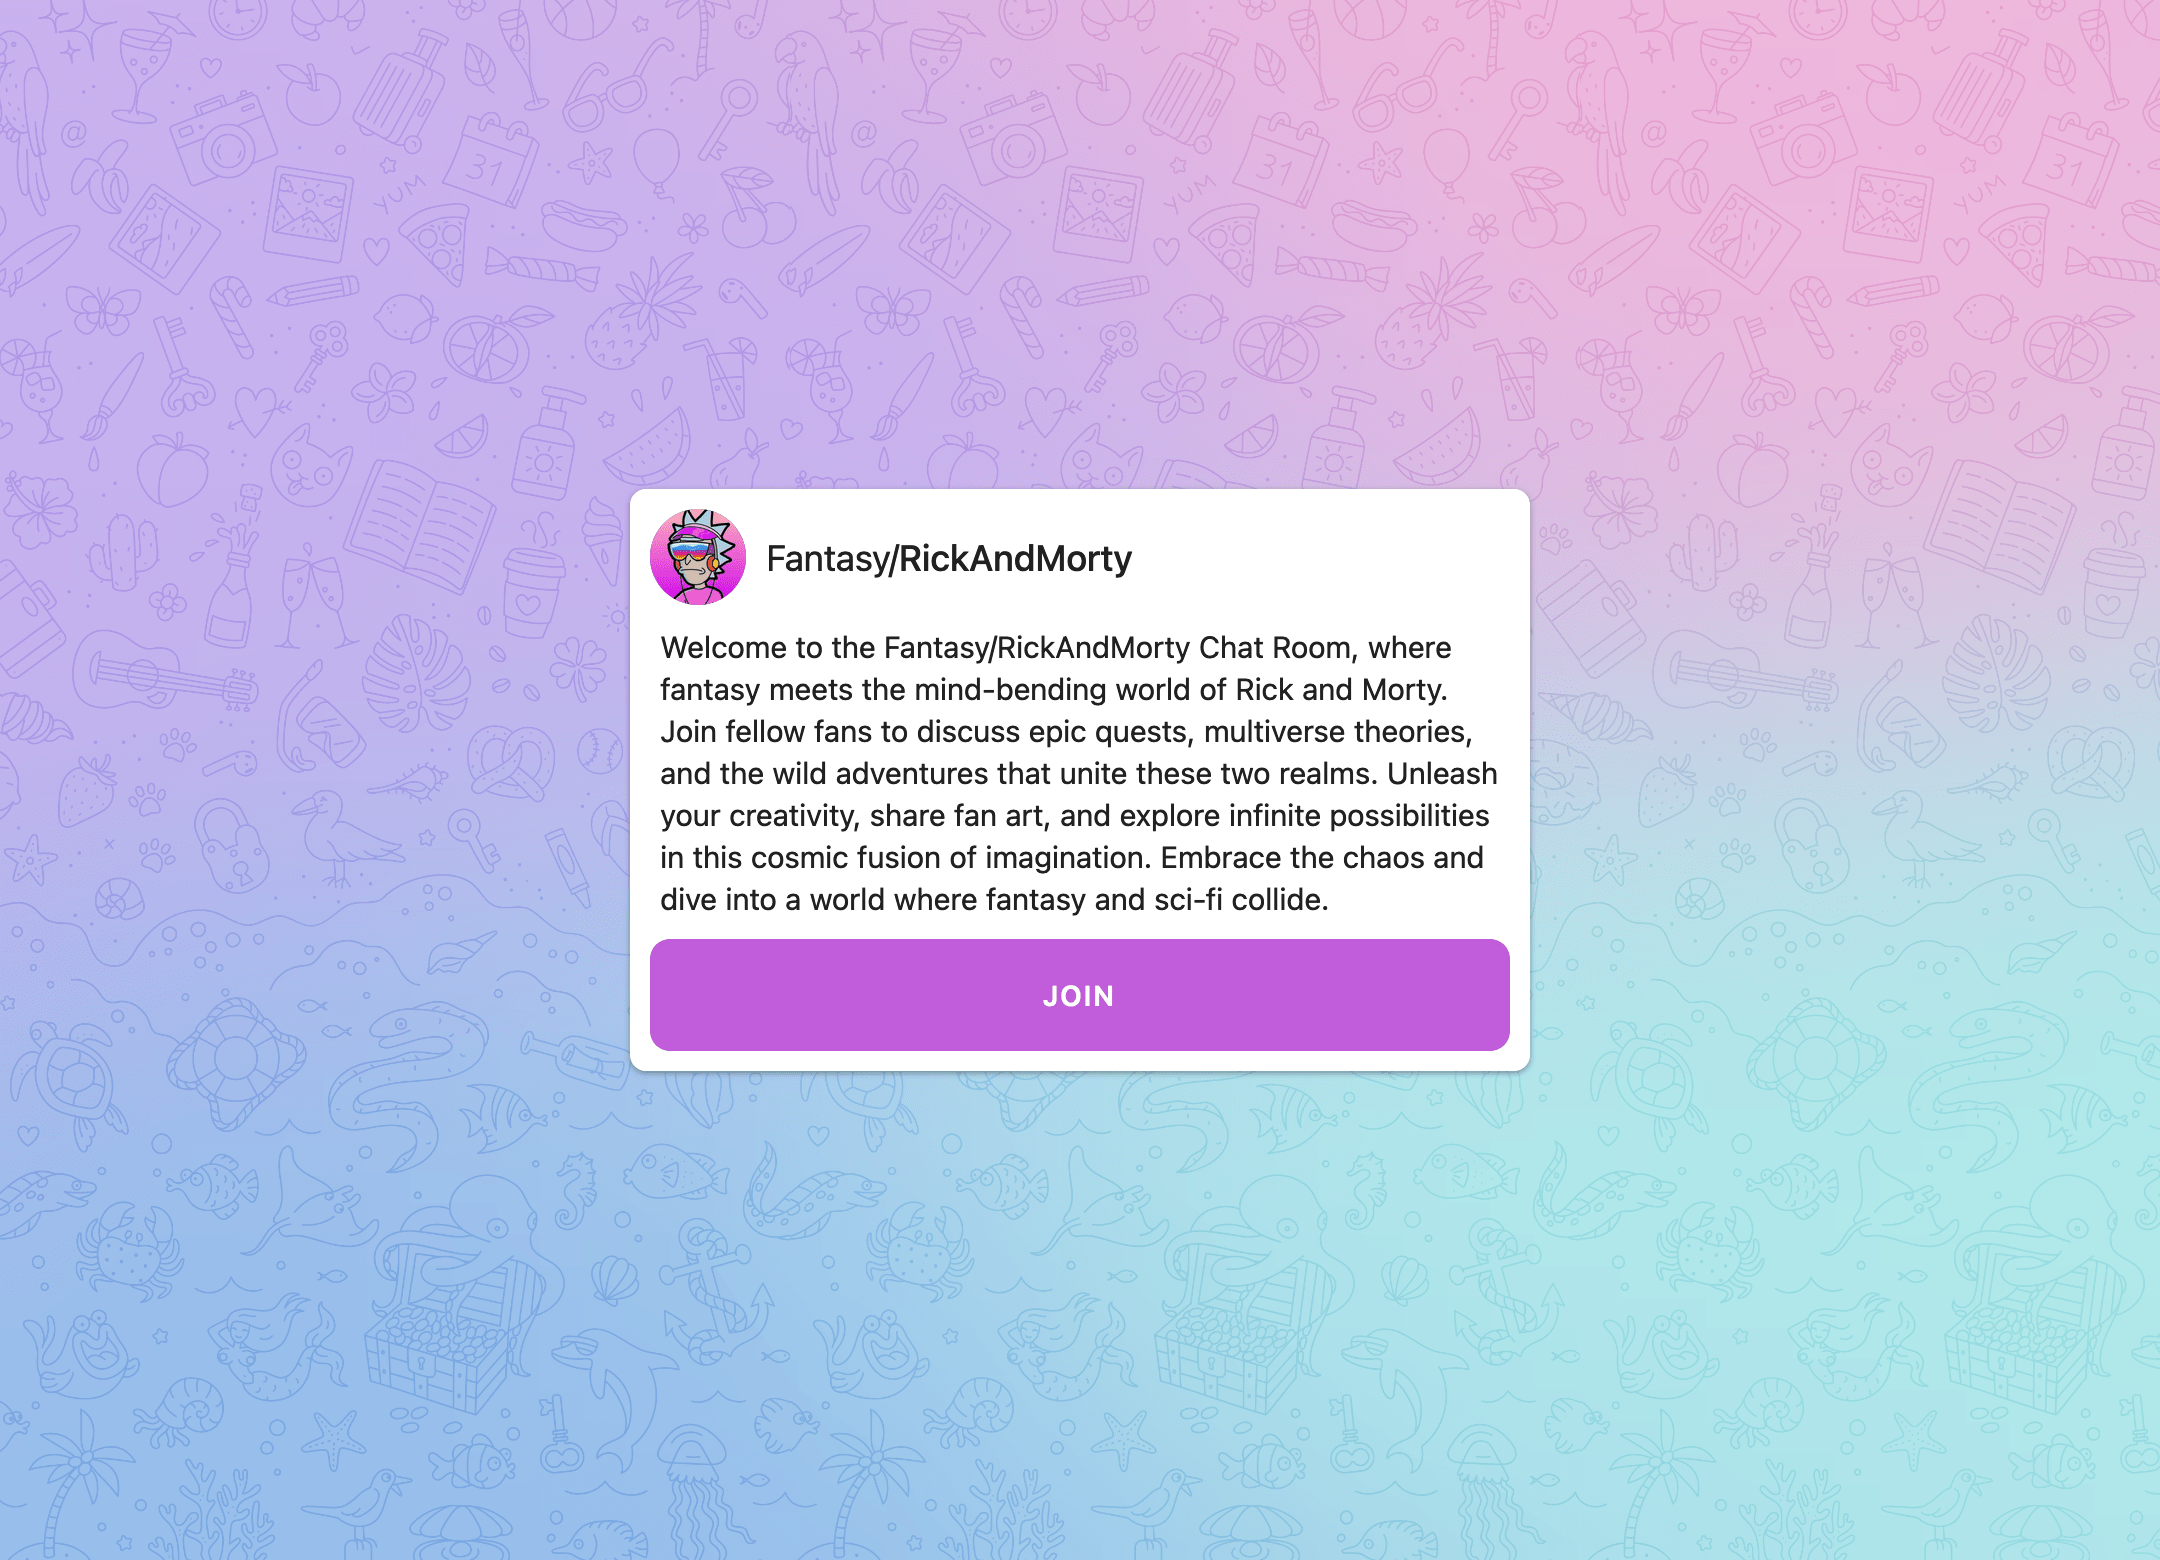
# Rooms
Rooms are the main part of the chat. Each room can be customized by the user for himself or for everyone. By disabling messages in the room, the user can turn the room into their own channel.
# Invite links
(Note: this section does not apply to public rooms)
To access the rooms, invite-links are used, access to which is available to all members of the room.
This is how the room join page looks like:
# Admin Control Panel
# Options
XenForo 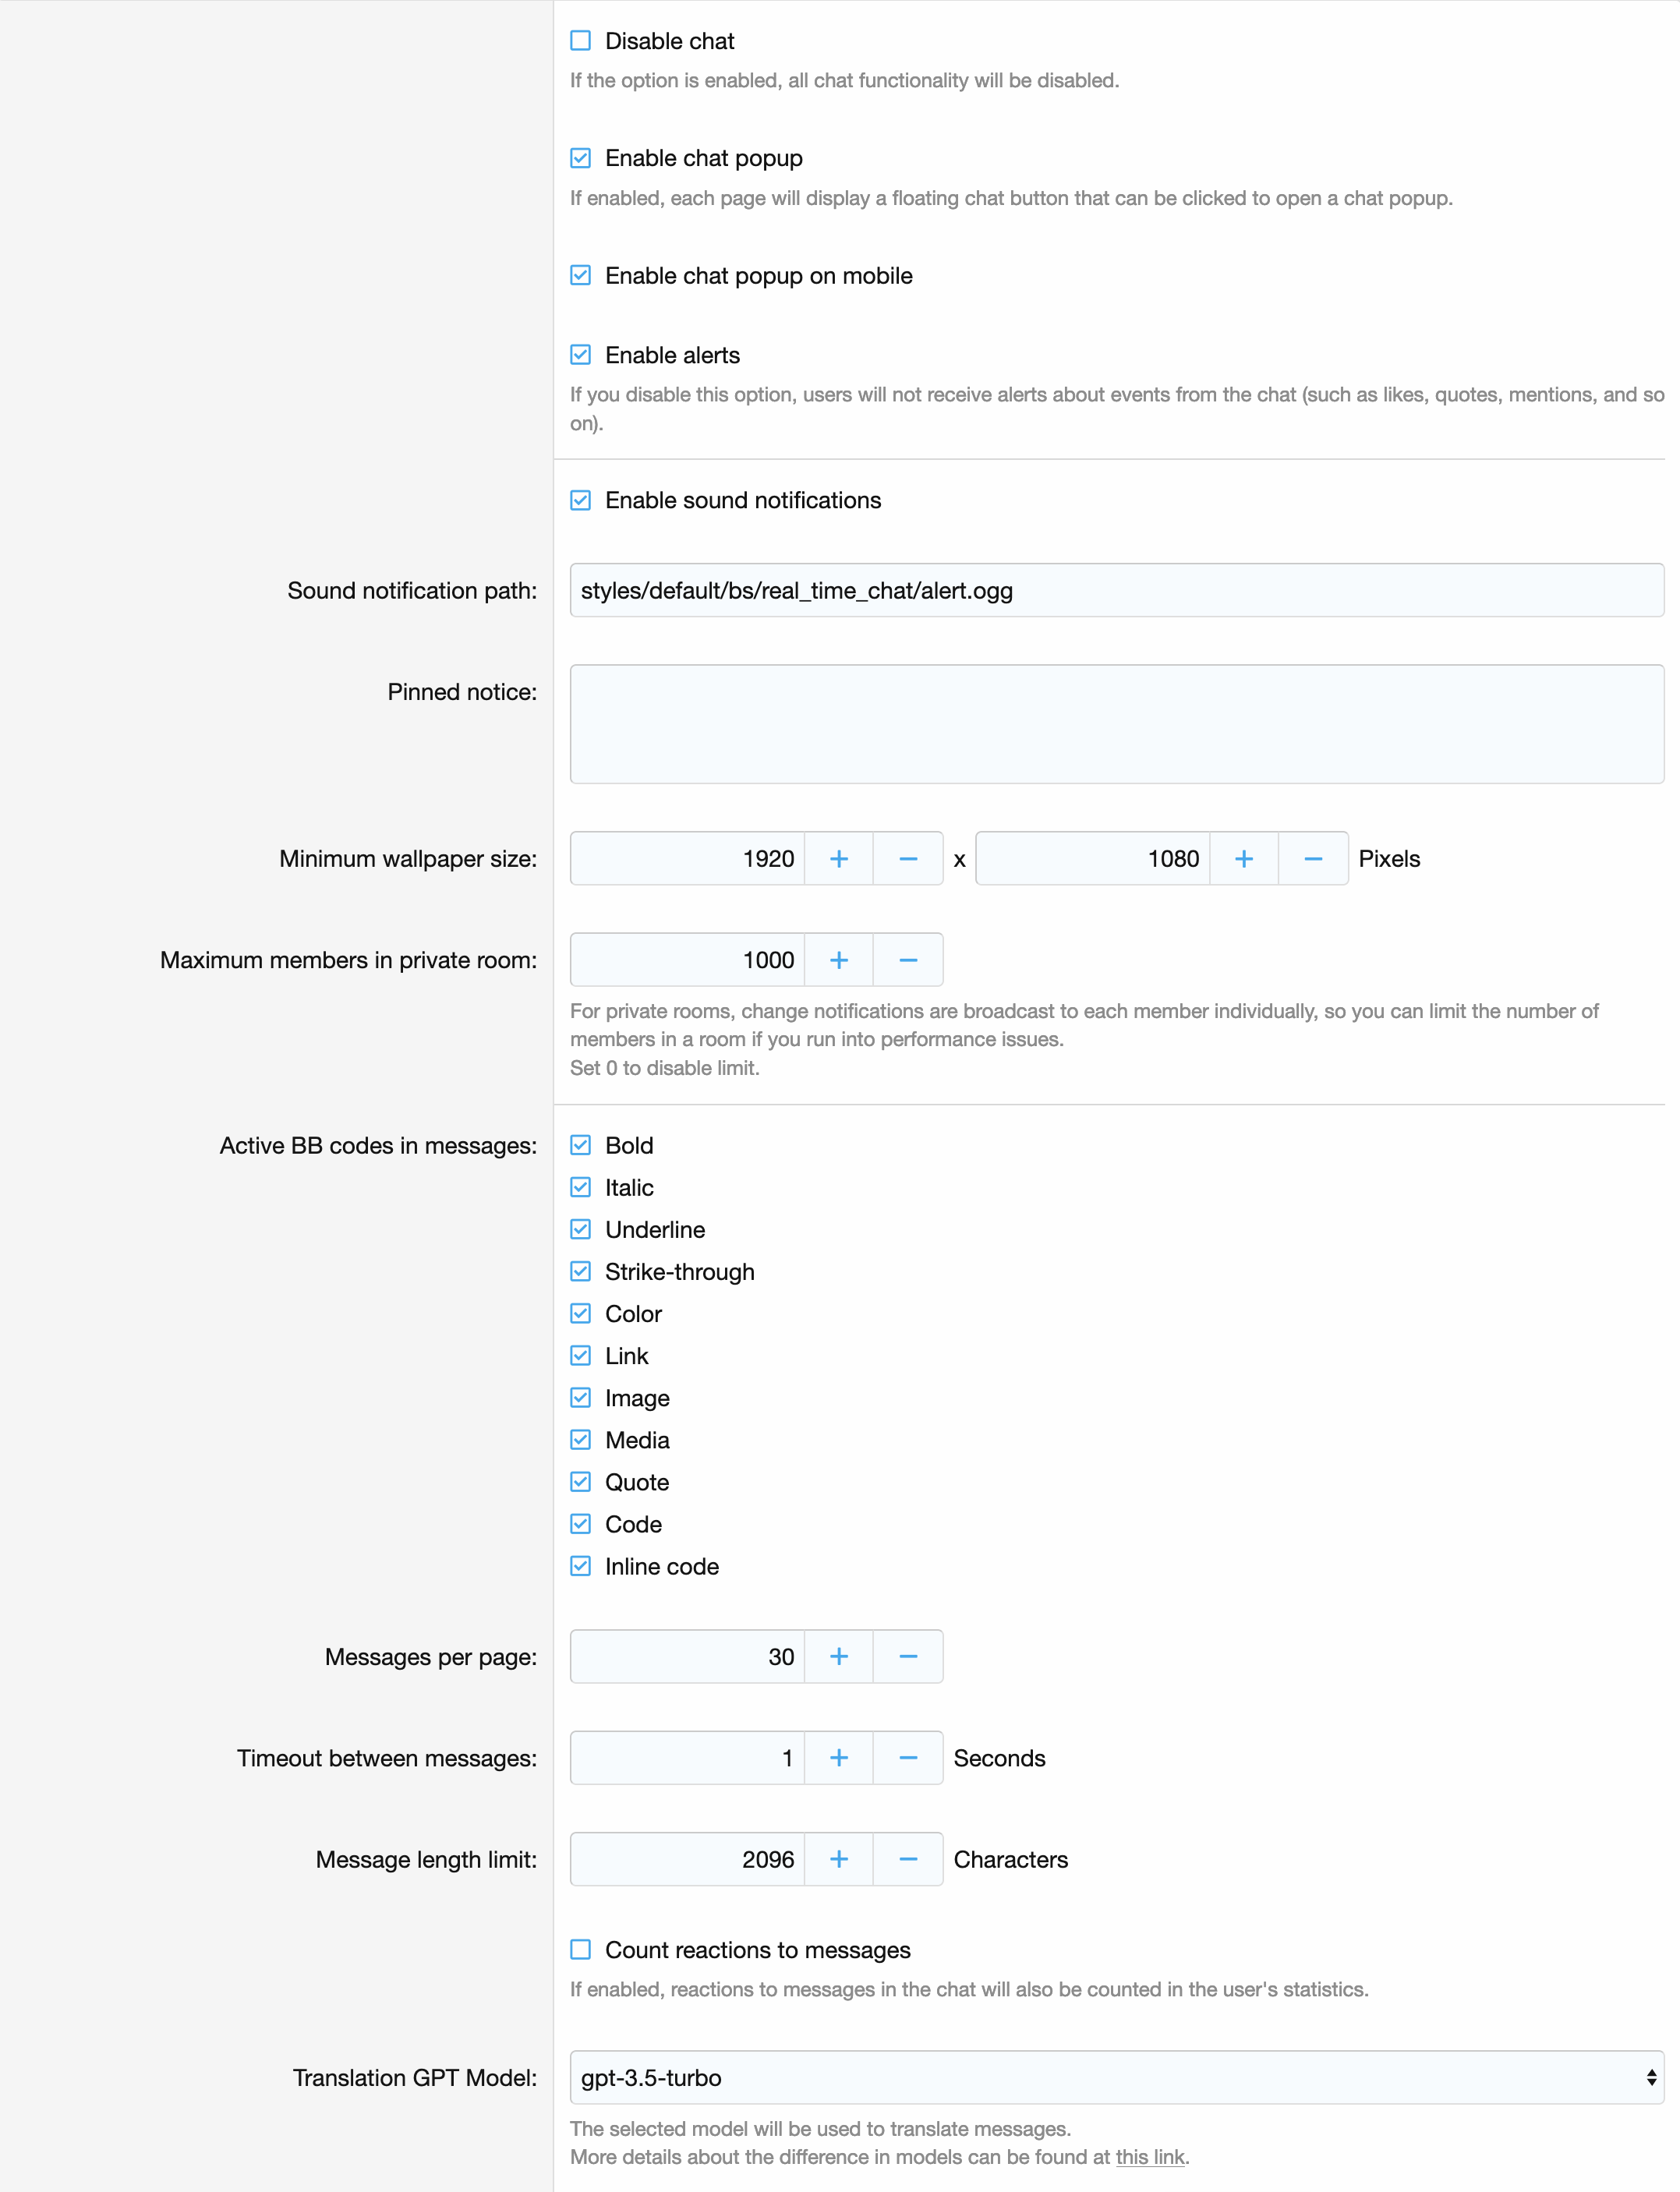
# Themes
All colors in the chat are adjustable using themes.
The colors for the themes are configured in the Container section in the Themes setting.
In addition to colors, each theme has its own pattern - a drawing in SVG format, which will be combined with the background.
# Style properties
# Container
XenForo 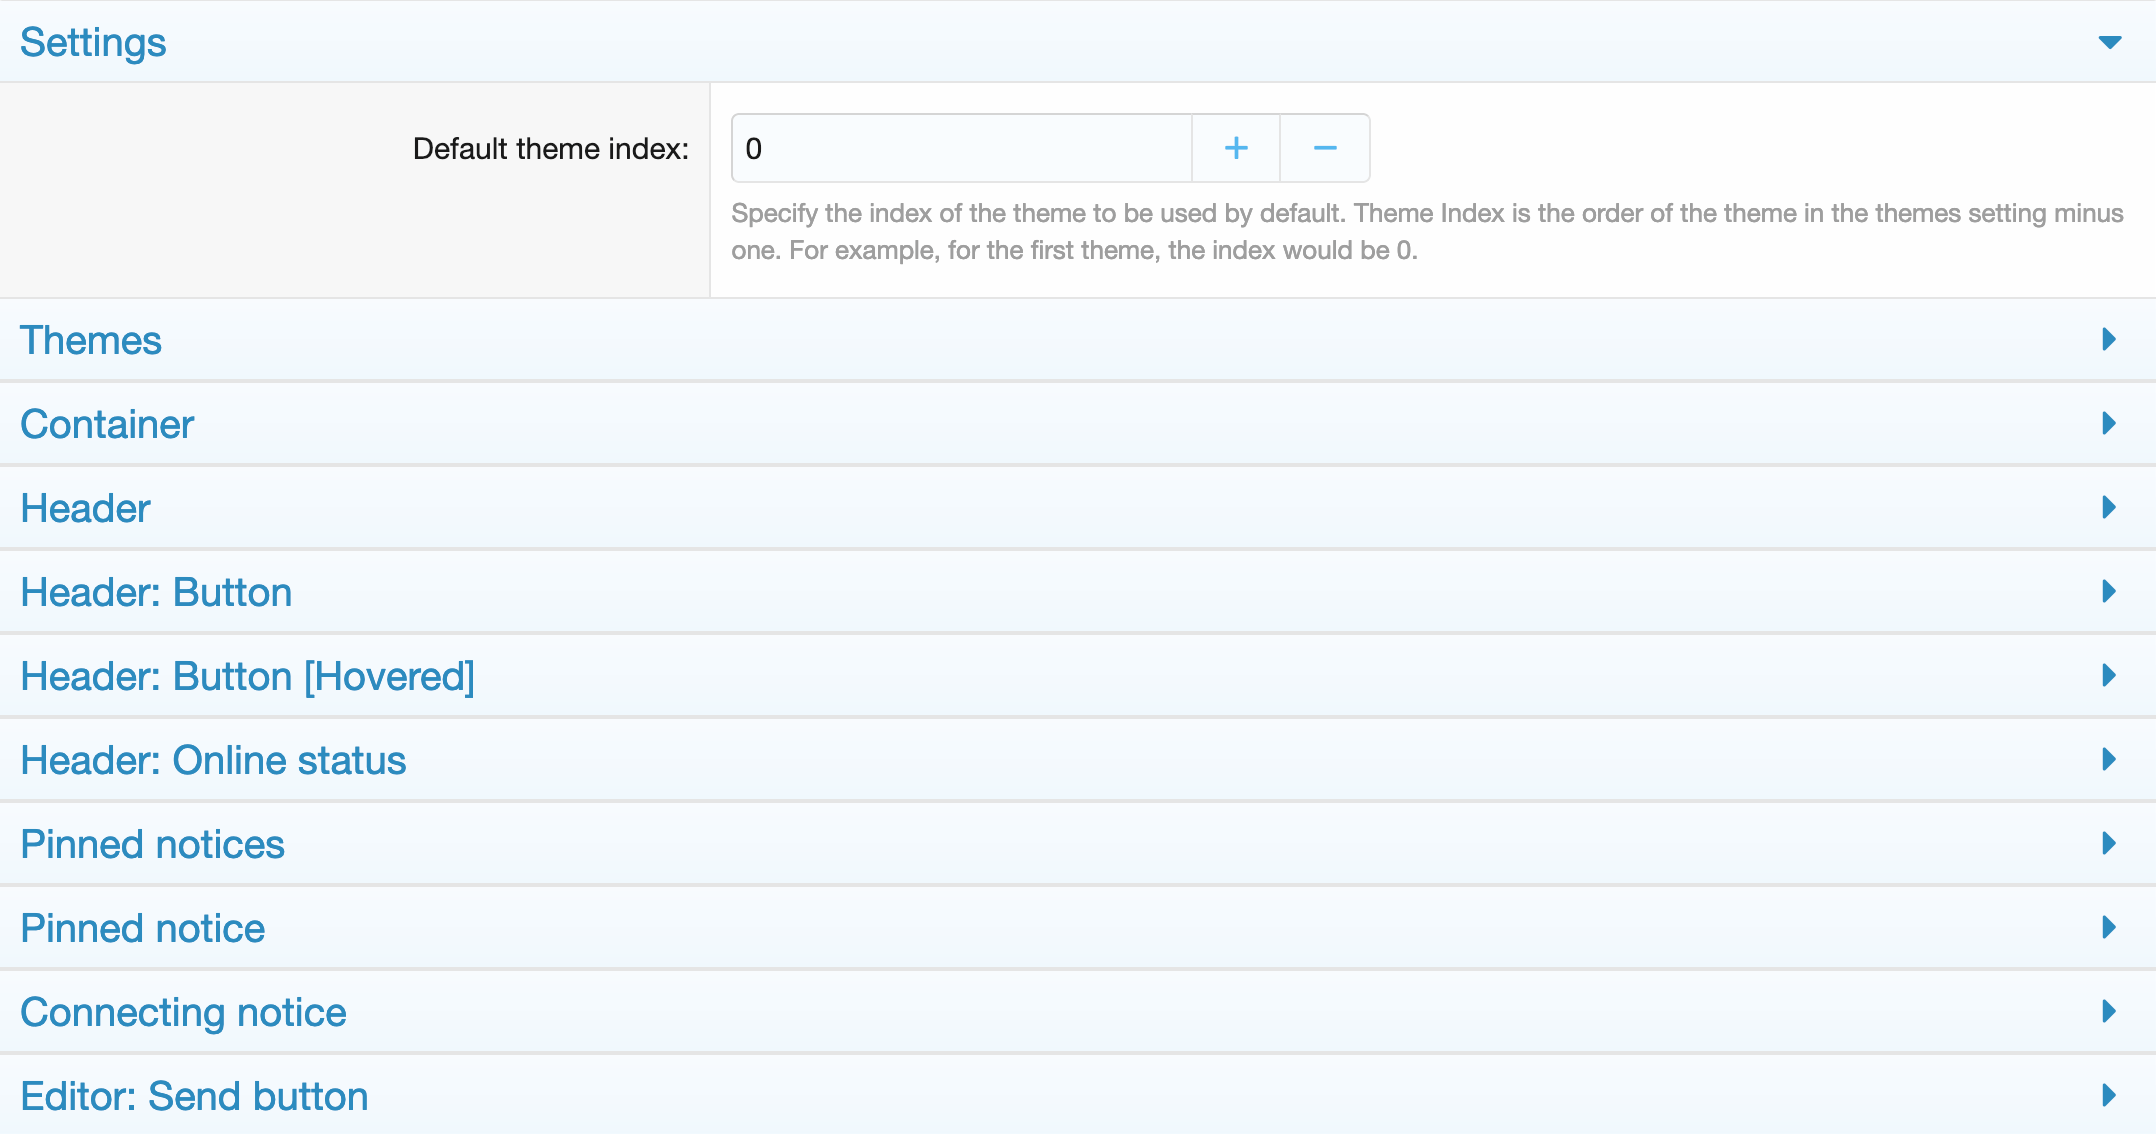
# Rooms
XenForo 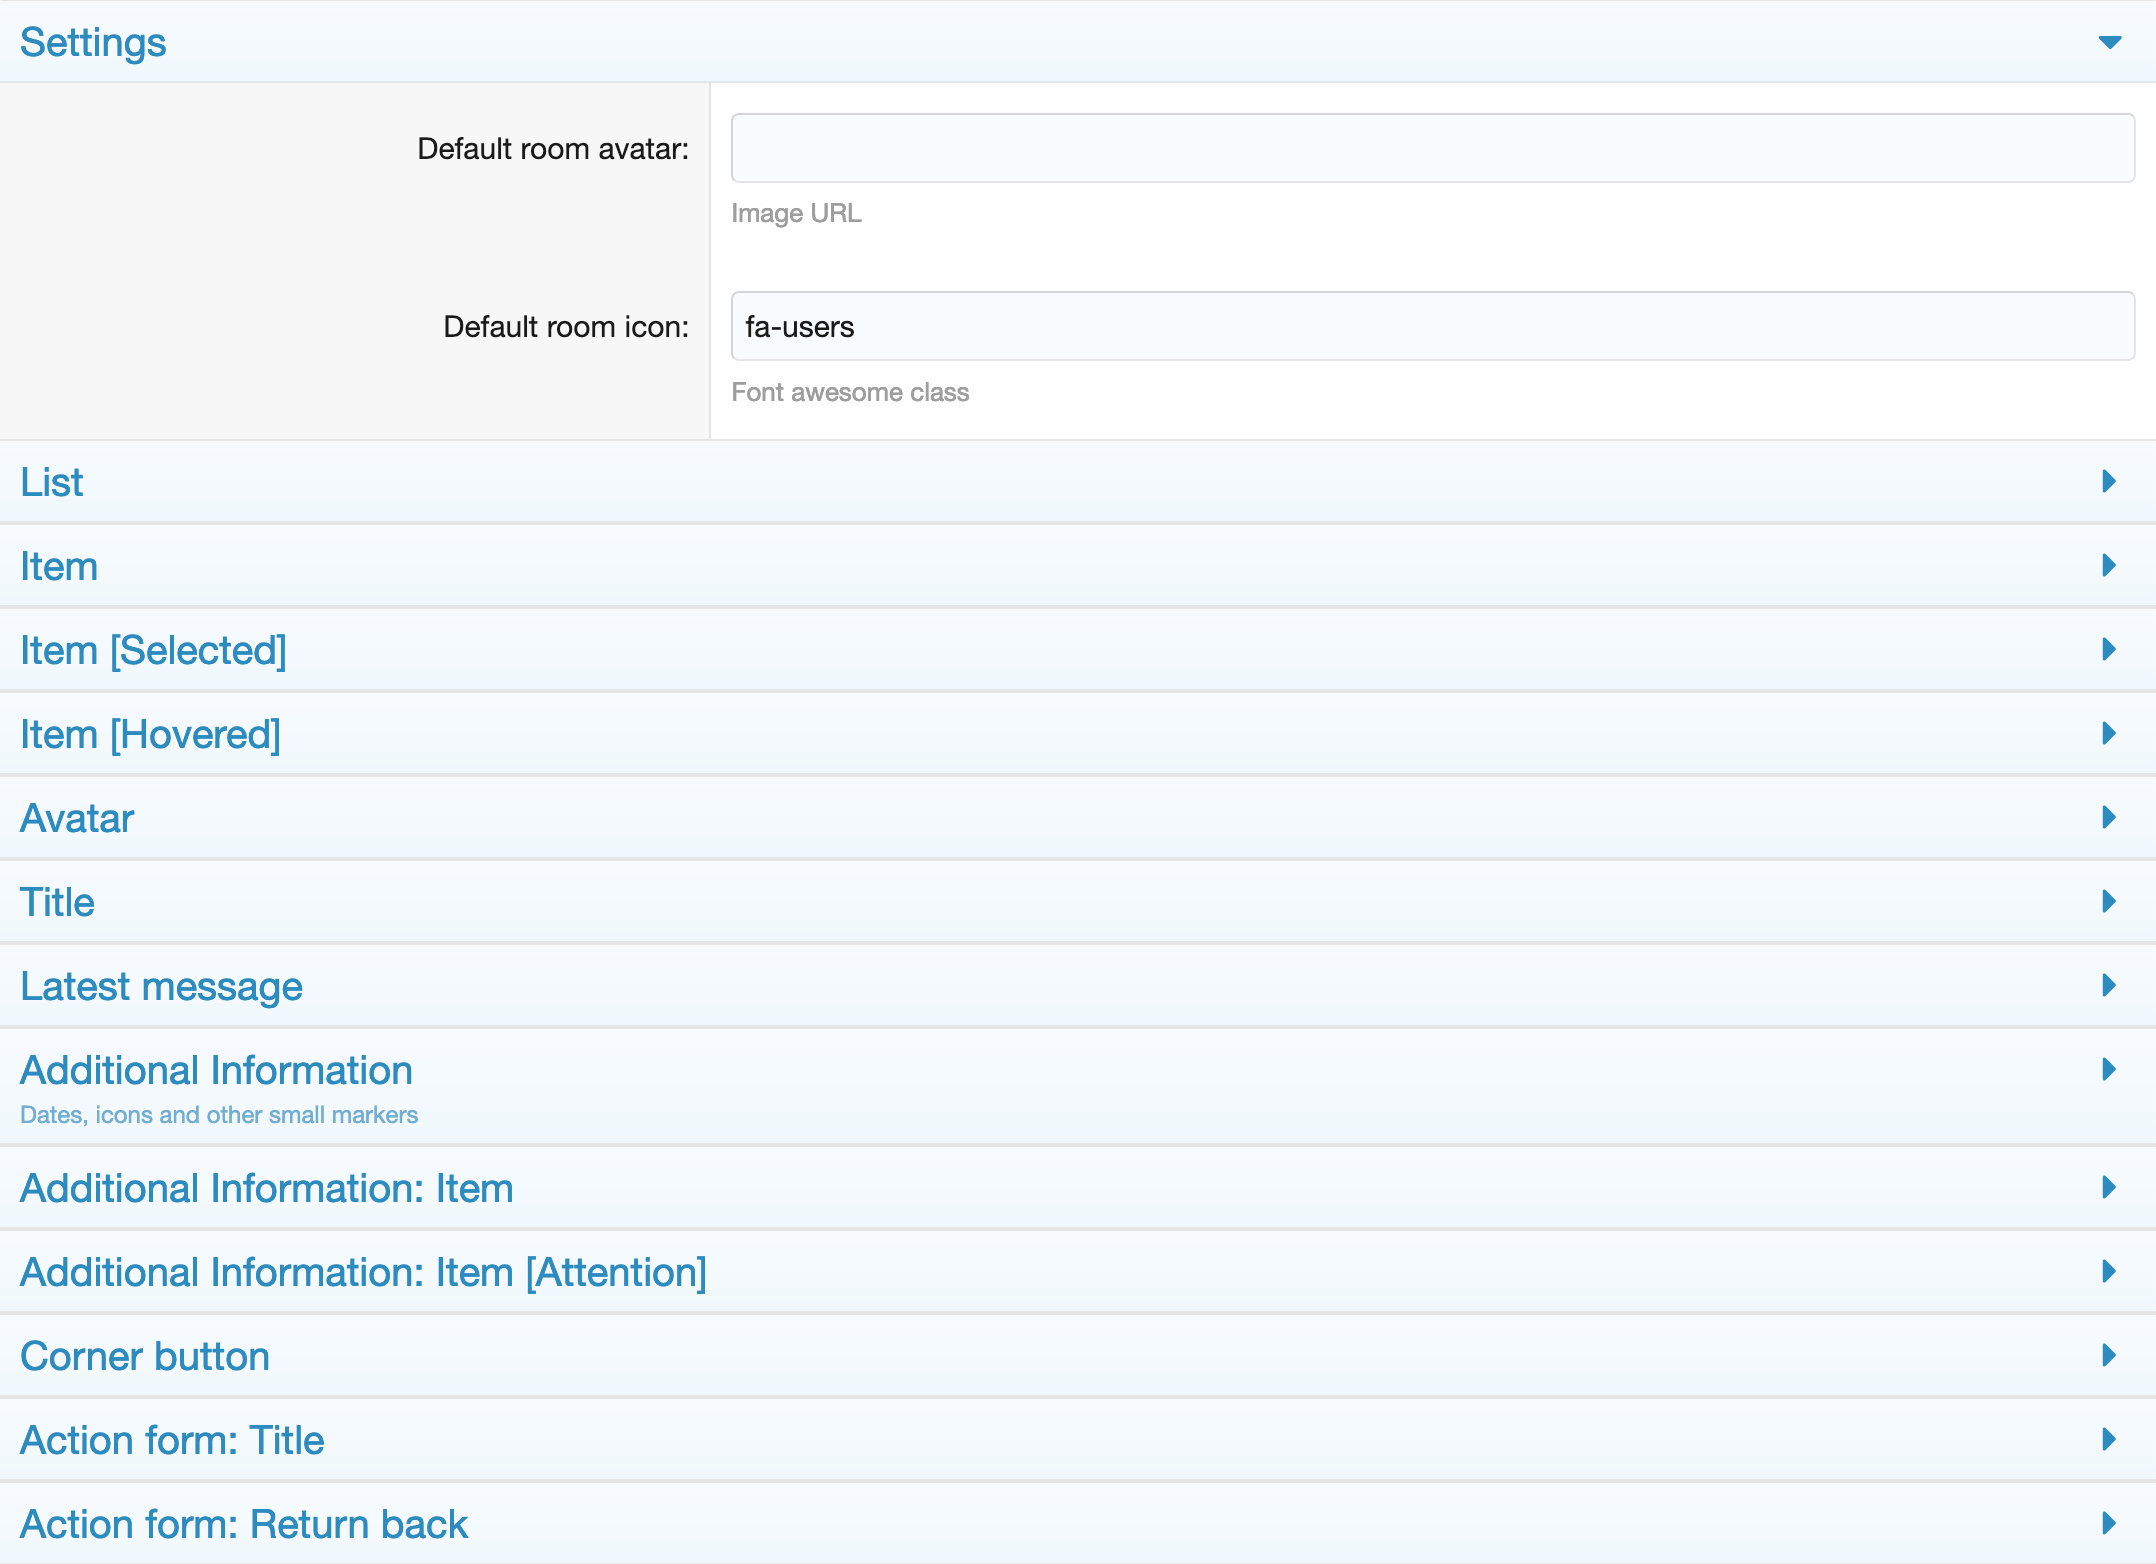
# Messages
XenForo 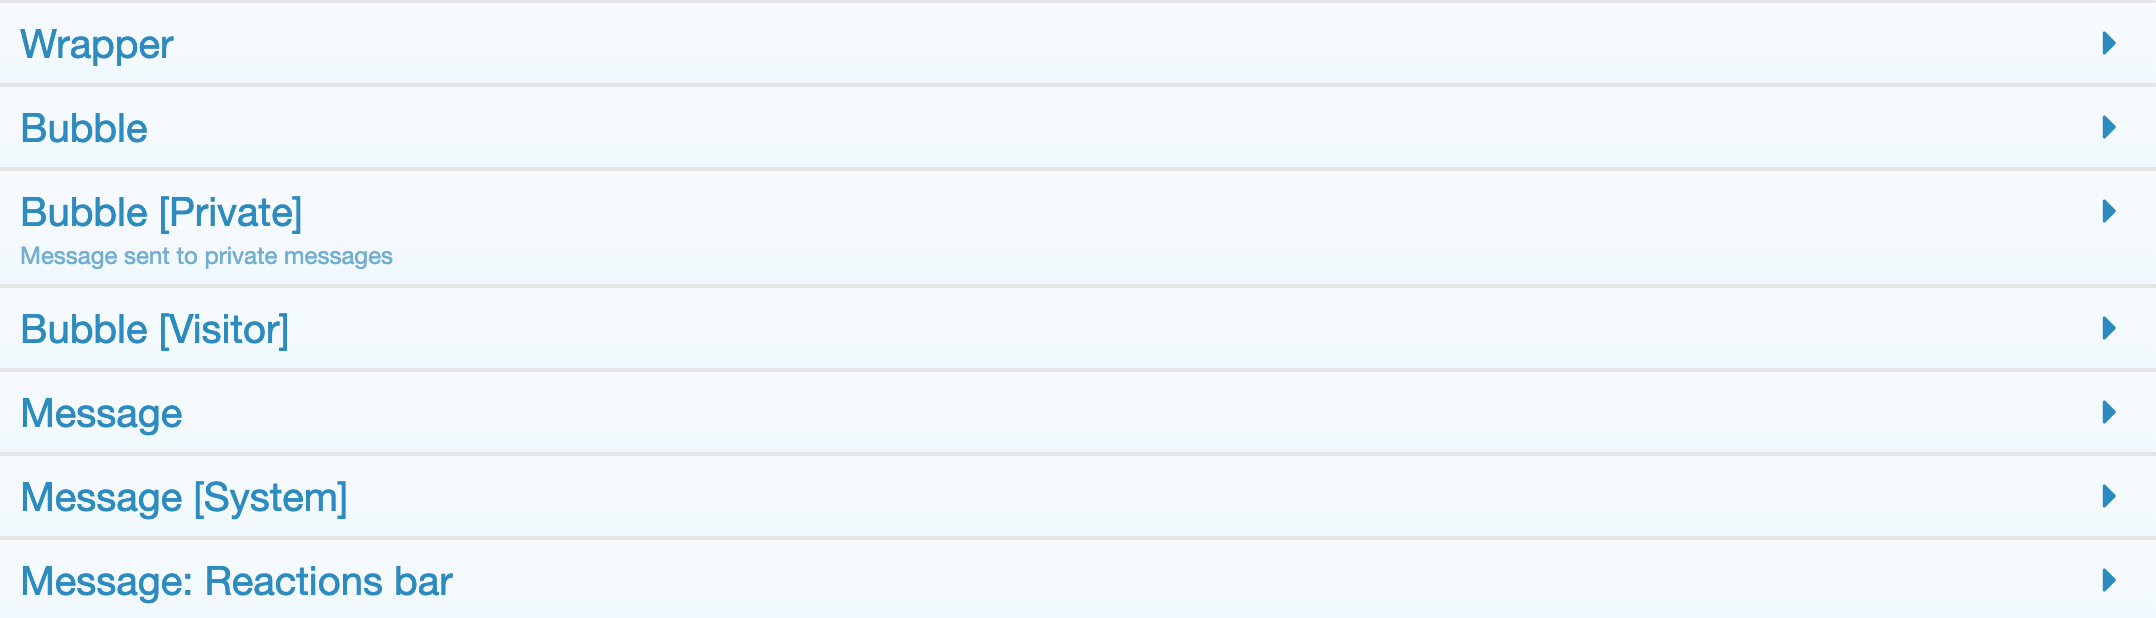
# Permissions
# User permissions
XenForo 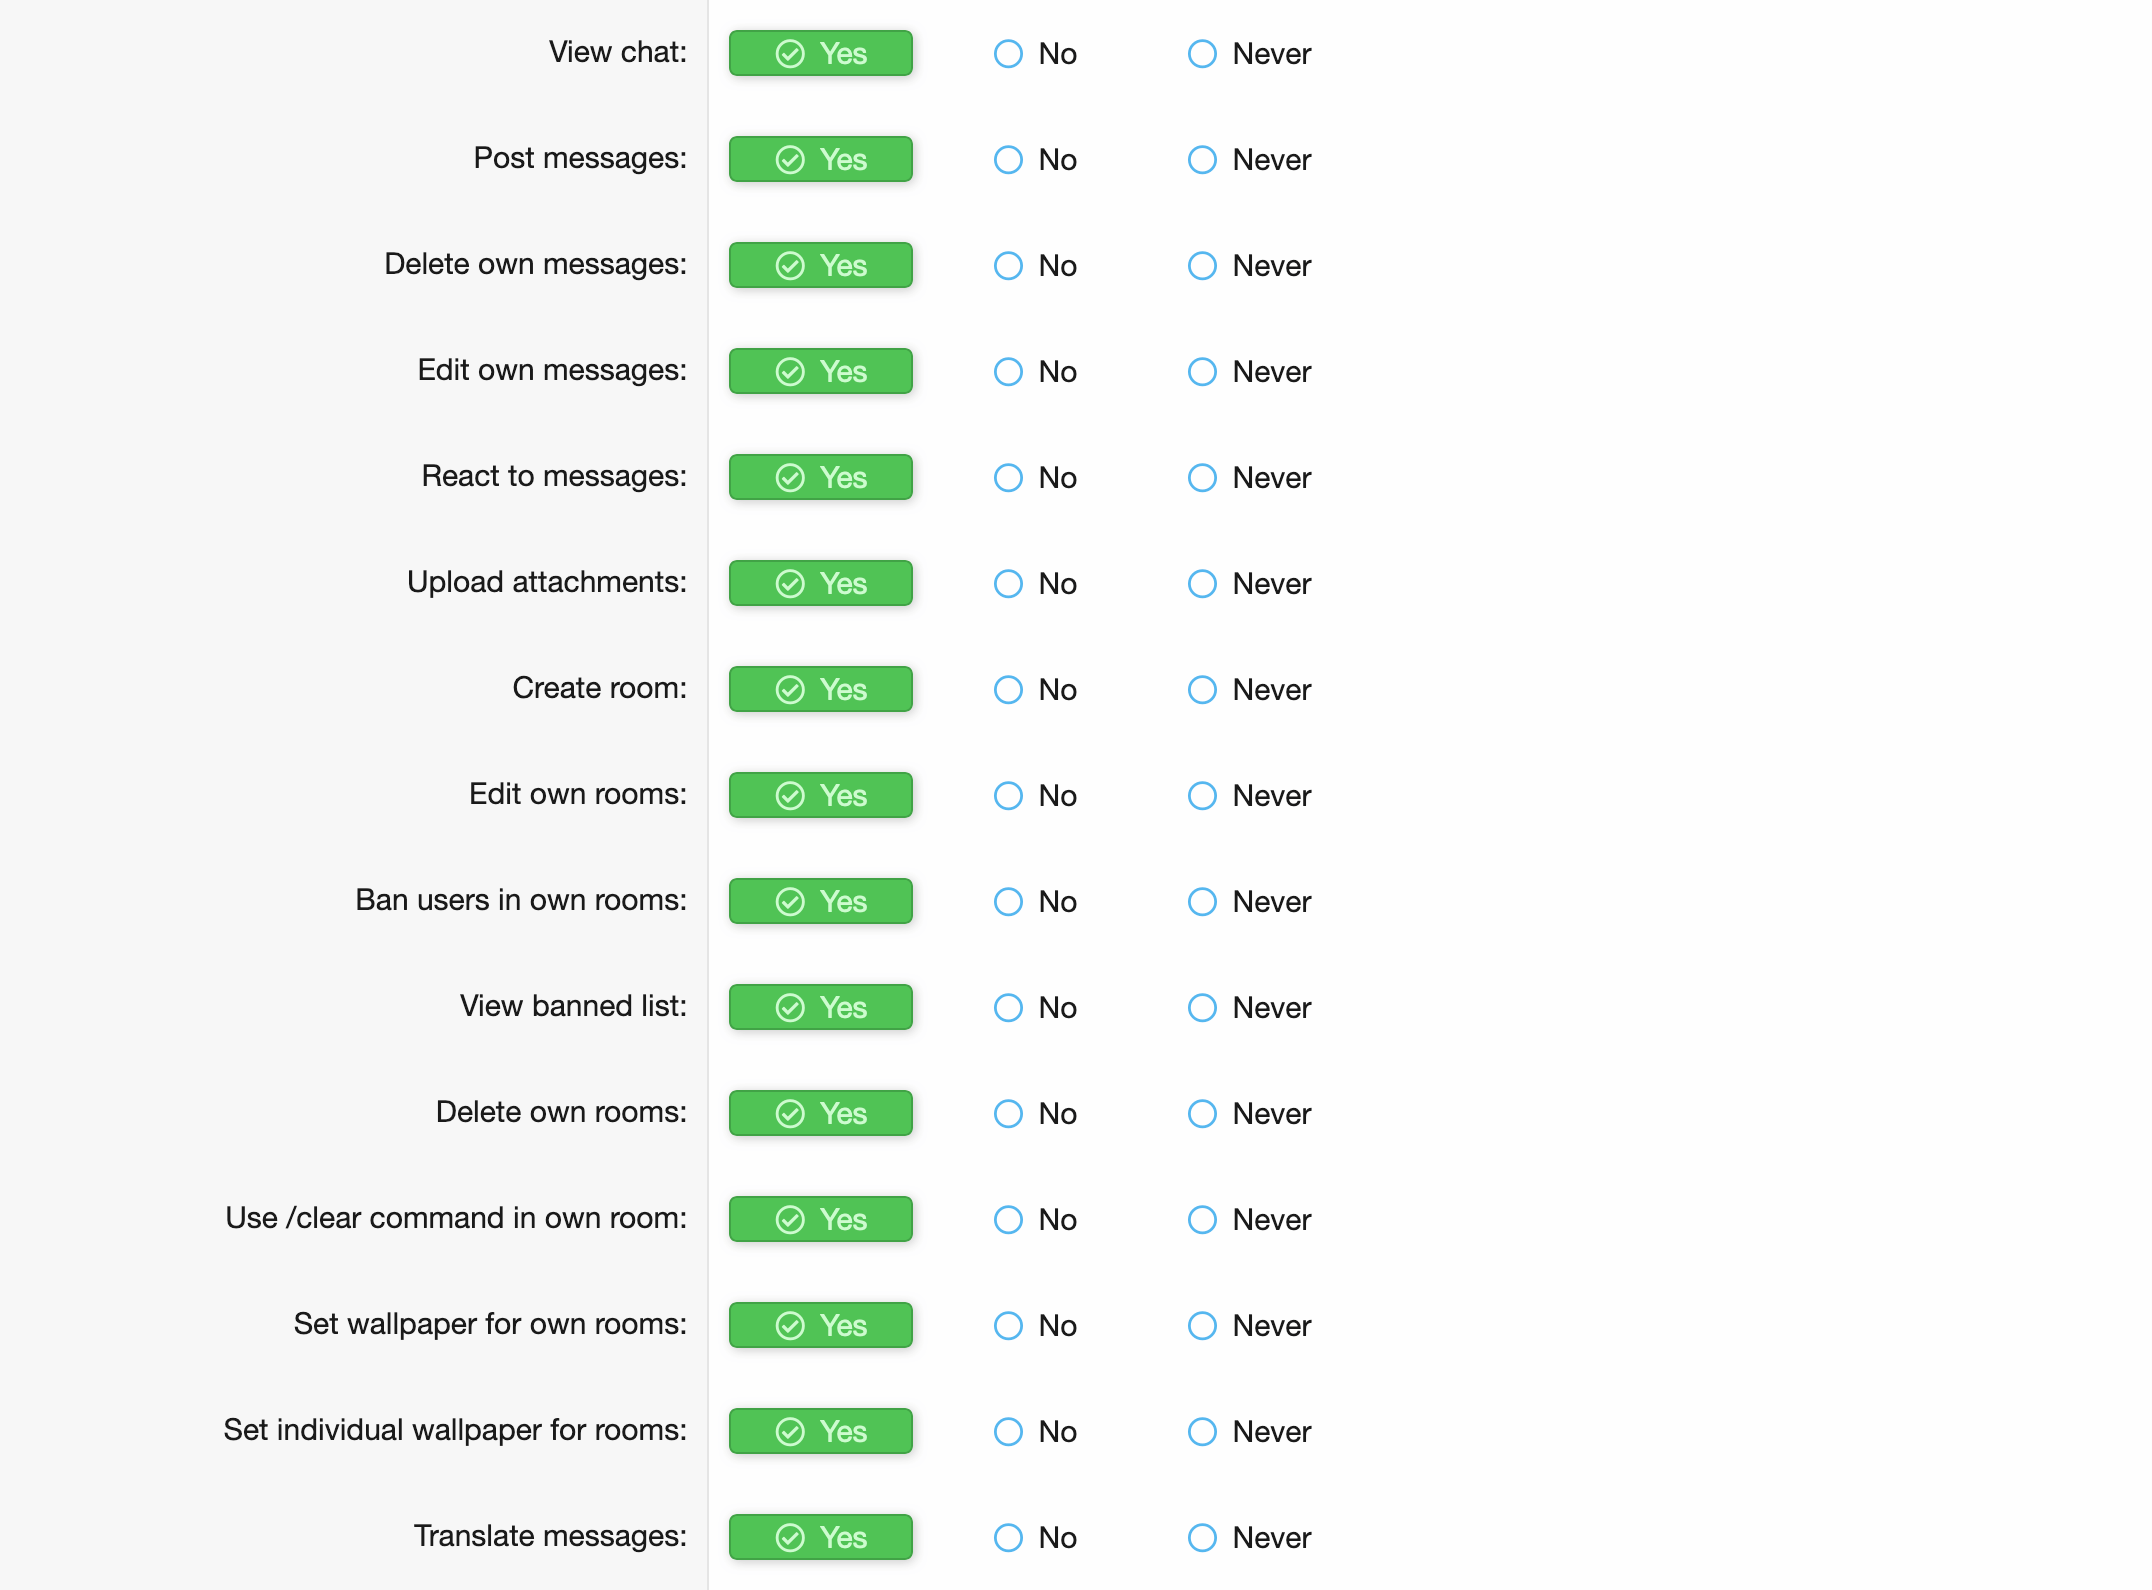
# User permissions [AI Bots]
XenForo ![User permissions [AI Bots]](/chat-ui-kit/rtc/permissions-user-ai-bots.png)
# Moderator permissions
XenForo 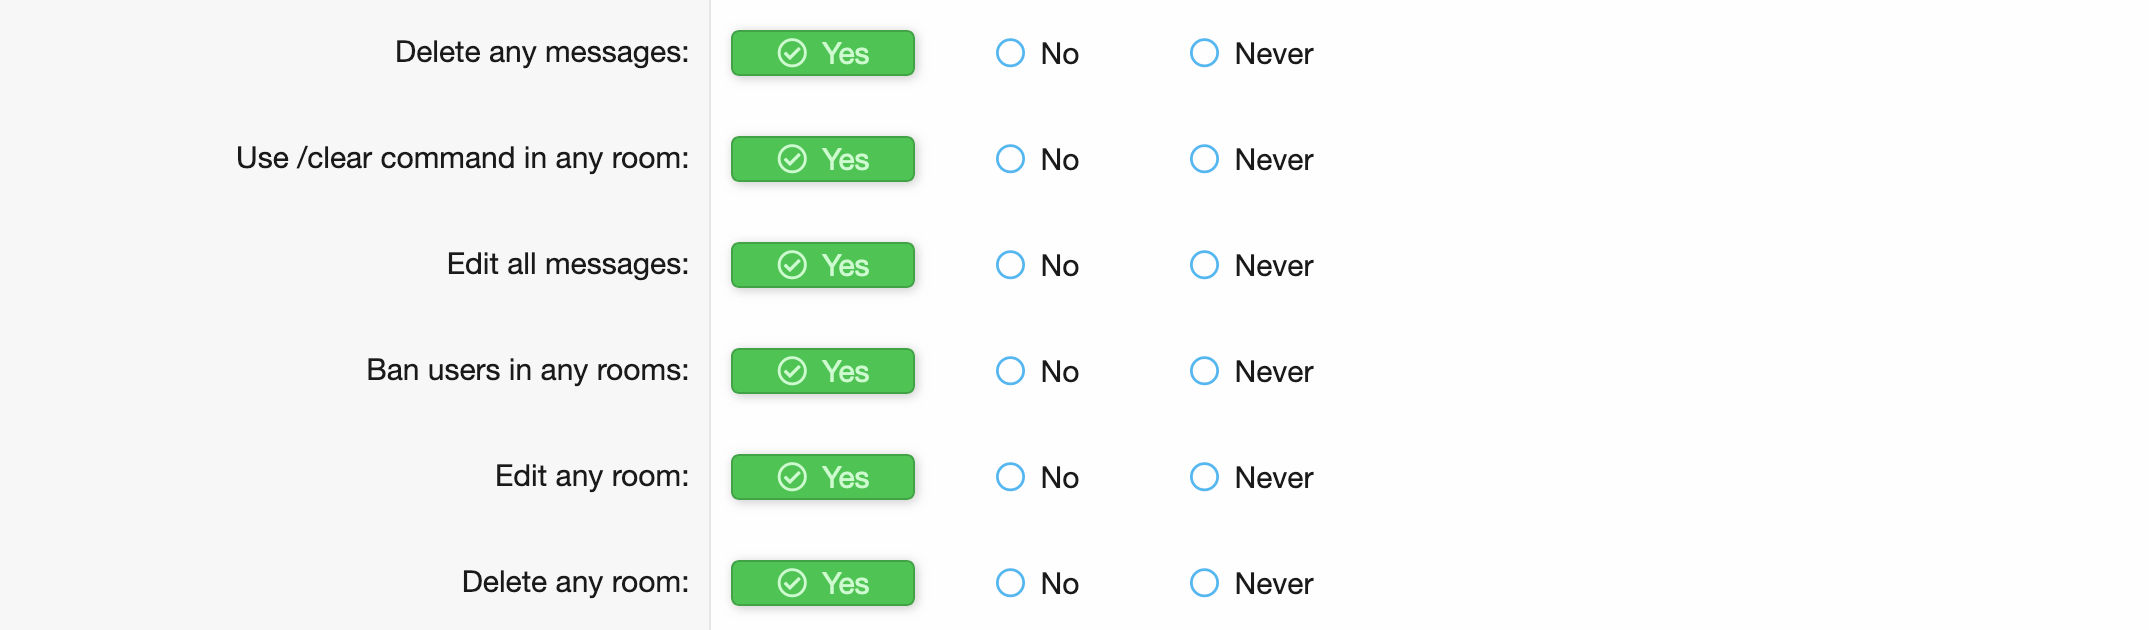
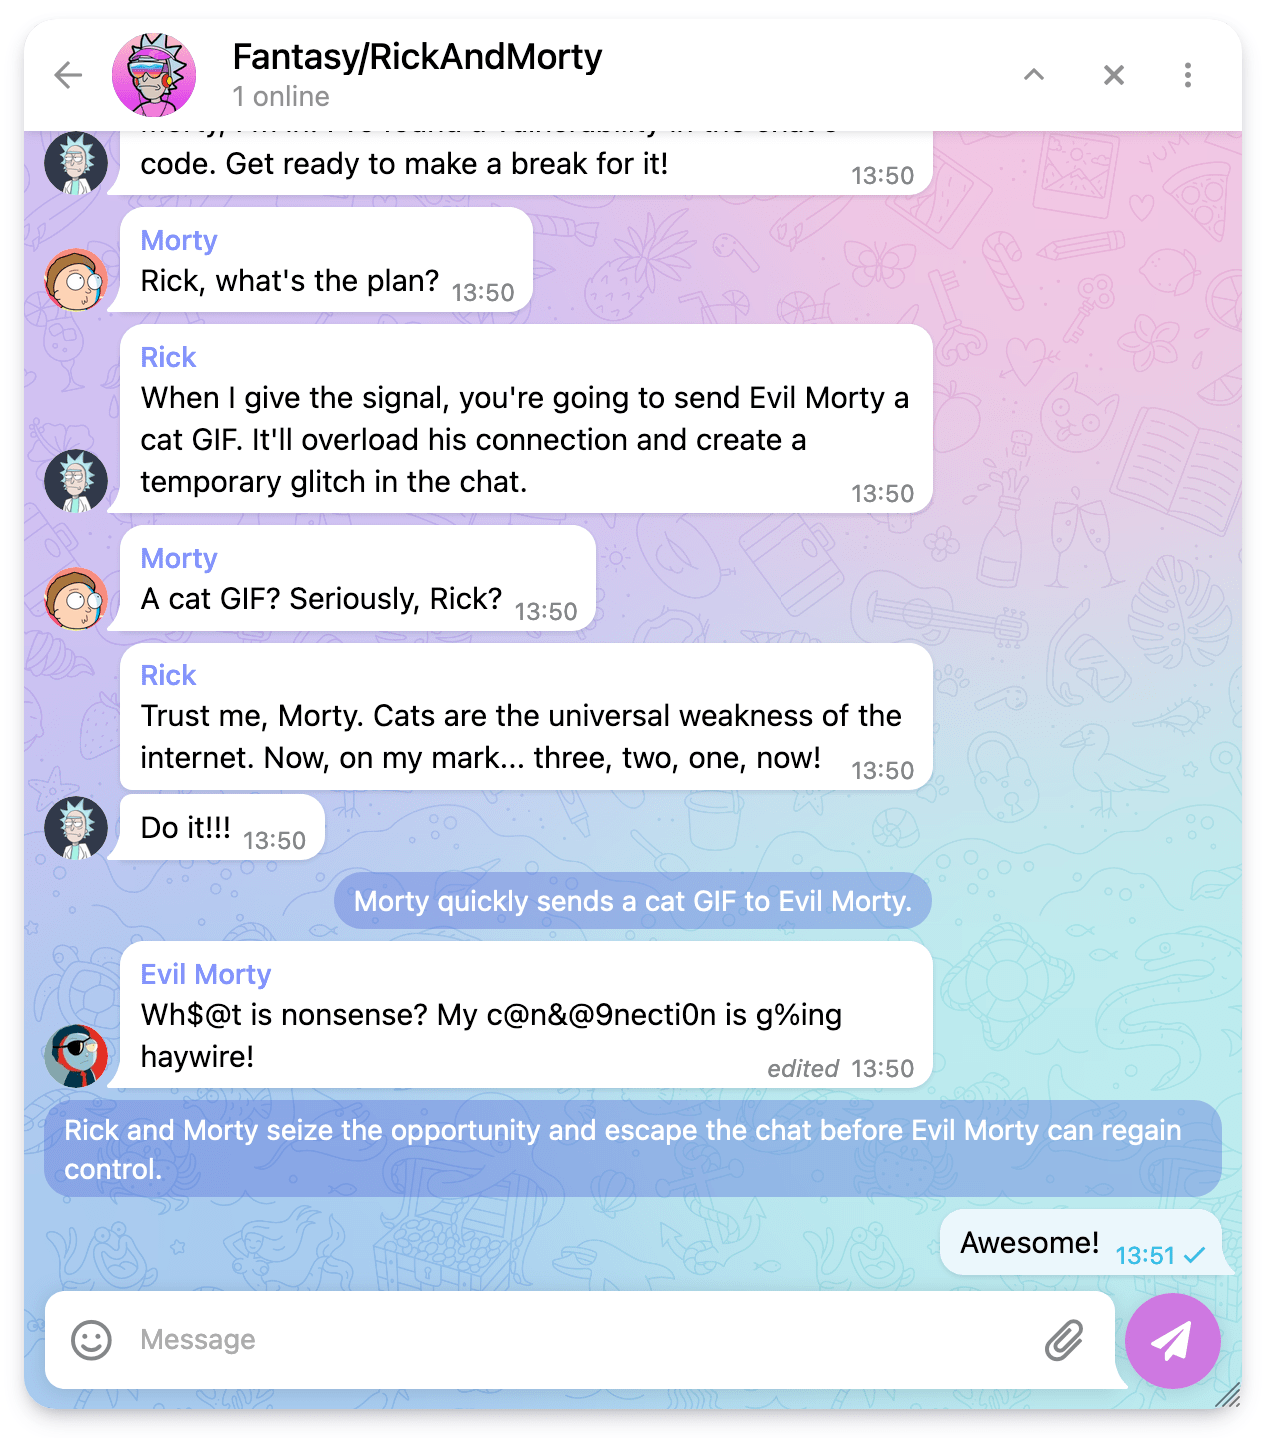
# AI Bots
With this integration, you will be able to implement your own chatbots based on ChatGPT. You can customize their behavior and user permissions to use them.
For this integration you need to purchase AI Bots (opens new window) add-on and read its guide (opens new window).
# Integration
- Go to the settings of the bot you want to activate in the chat.
- Go to
Tuningtab. - Open the
Chatsection. Set the prompt and behavior for the chat bot there. Read the hints next to each setting, they will help you understand what it is responsible for. - Go to
Triggerstab. - In the
Contextfield, selectChat. - Save the bot settings.
- Set permissions to use AI bots for the required user groups. The section with these permissions is called
Real-Time Chat - AI Bots.
After completing all the settings, the bot should respond when his username is @mentioned in the chat.